Thursday, November 14, 2013

Summary of the First Trimester


Throughout the course, I learned several new concepts. Although I knew much from AP physics, I didn't know a lot of things. For example, the testing process that goes into making safe cars in accordance with physics. I learned about string instruments as well, from how they are built to the science behind it. I knew about amplitude, vibration and resonance, but I didn't know how volume affects the resonance of an instrument. This was the first time using tools such as the band saw, jigsaw, belt sander, and drill press. It was certainly pretty cool to learn how to use them.

One of the biggest things I learned was how to apply the design process to creating new products. From planning to testing, I had never used a specific method to make good designs. It's cool to think that we're using the same thing that high-level engineers at large companies use to make their products as well. I could also see how important it was to truly understand science to make a useful technology.

In the future, I plan to pursue engineering. Certainly the knowledge about tools will come in handy at some point in my life; more importantly, this served as an introductory experience to how I will solve problems in the future. That pretty cool to think about -- I could certainly see myself having a job in this type of process. Knowing that you're creating technology is definitely a cool thing.
http://blogs-images.forbes.com/tykiisel/files/2013/03/14594978_WelcomeToTheFuture_03112013Final1.jpg
Definitely one of the coolest things of the future will be the technology -- what will seem magic to us then?

Choose a Project: Musical Instrument

Project overview: For our next project, we had choices. We could either make a robotic arm that would pick up small objects, a musical instrument that could play a scale, or a bridge and seismograph. We could even make our own project if we desired. George and I decided to create a musical instrument, an imitation of a cello.

Technological Concepts: Our cello is an example of a chordophone, an instrument that produces sound through one or more vibrating strings, where vibration is the oscillation of  a string at the point the vibration was initiated at. We had to consider the materials (thin wood) and the volume in order to create a chamber that would resonate -- vibrate with the strings' vibrations -- and project and mature the sound. When the string vibrates, a larger amplitude (harder pluck) is a louder sound; the tension in the string determines the frequency -- how many times per second (Hertz) -- it vibrates at, which in turn directly correlates with pitch.

Learning Goals: At this point, research and planning took a greater role in the design process. As is the nature of musical instruments, bridges, and robotic arms, it is essential to plan out meticulously how you are going to build the structure. During the implementation, a greater independence in the creation of different parts was required, in order to finish the project in time. Often people were required to be doing entirely different things, and then would come back to assemble the parts.

Instrument Description: We created a slightly small cello, which was 26 inches in height, 20 inches in width, and five inches deep. Thing wood was used for the main body, with a thin board supported by a thick board was required for the fingerboard. Small blocks of wood were used to act as a bridge and to raise the strings above the fingerboard. Wooden pegs were implemented at the end of the fingerboard, with nails holding the end of the string to the body. Long four inches pieces of wood were put along the sides in the body to give strength, and a wooden dowel rod was placed underneath the bridge to support it when the strings were tightened.

Positive Feedback:  We were quite proud of creating an instrument that in many ways mimics real cellos. The fingerboard was stiff throughout the entirety of the wood, and small touches like the structural supports and the wooden dowel rod underneath the bridge really made a solid design. When played, the cello had a surprisingly good amount of resonance due to its volume, unlike many homemade stringed instruments.

Redesign Paragraph: The two main things that come to mind are the height of the side pieces and the wooden pegs. The wooden pegs simply could not hold tension, so we had to try and use toothpicks to hold them in place. Also, the height of the side pieces didn't match for some reason. Even though we measured the heights meticulously, we should have made the heights uniform; it just looks a little unprofessional because of it.

Technological Resources: George and I created the cello once again, still with Dr. Sartori's advice on supports, pegs, glue, and whatever else we needed. Electricity powered the jigsaw, belt sander, band saw, and glue guns that we used to create the instrument. It took two and a half weeks to construct the project, in 60 minute class work periods. We used or knowledge of string instruments and woodworking together to make the cello. Lastly, the resources we used were nails, wood boards and dowel rods, nails, Elmer's glue, and hot glue.

Biggest Challenge: Our biggest challenge is the peg box, as we chose to use wooden pegs. They simply can't hold tension and slip in the holes, and tape didn't work and we couldn't glue them. The string also cuts into the wood at its point of contact. As of writing this, we are going to attempt to use toothpicks to hold the pegs in place; we think it work, but it takes a lot more work than we expected it to.

What we learned: We discovered that independence in constructing a project is essential to be efficient. We wouldn't have finished otherwise. Also, we learned that using ideas from other successful instruments was very helpful. With the wooden dowel rods underneath the bridge (inspired by real instruments) and other elements like the bridge and pegs, real instruments really inspired our design. I think collaboration and inspiration of ideas is a good thing; it fosters innovation, competition, and a better standard of life for people.
Through a piano, one can create incredible and magical sounds.


Wednesday, November 13, 2013

The Nearly Unsuccessful Mousetrap Project

Project Overview: For a few weeks, we were given the task of creating a small wooden vehicle that would be propelled by the energy in a mousetrap. We could bring in our own wheels and materials to create unique, more effective designs. We had to select which size dowel rods to use, what size wheels, what diameter axles to use, among other things to design a vehicle that would travel the furthest.

Technological Concepts: At its most basic level, this project was about discovering the most efficient way to transfer the potential energy in a mousetrap into the kinetic energy of the vehicle, while minimizing energy lost to friction. Potential energy is "stored" energy, while kinetic energy is the energy of motion. Friction is two imperfect substances that rub against each other, dispersing energy in the form of heat. We also had to consider the diameter of the wheels (larger wheels take more energy to rotate) and the diameter of the axles, which would determine the wheel-to-axle ratio. Higher wheel-to-axle ratios were harder to rotate.

From the front
Learning Goals: We continued to apply the design process to decide which materials to use, and what size of materials to make the most effective design. However, a main focus of this project was learning how to use tools to speed up construction and improve products. We had to consider what the best tools were and learn the basics of safety for a variety of tools. A greater role of testing was emphasized in this project; often designs would not work very well at first or not at all, and all projects had to test to maximize the distance the vehicle would travel

Mousetrap Design: Our design utilized a single, thin piece of wood with holes bored through it for lightness. Small squares of wood were attached with holes drilled through for axles; records were implemented for the rear wheels with small plastic ones for the front. We attempted to minimize weight while still retaining a high wheel-to-axle ratio.

Positive feedback: Our design managed to go 32 feet, which we were satisfied with. Although it moved slowly, it moved very steadily. We were proud of this fact, considering our design did not even move initially; our testing phase was very effective. We also succeeded in minimizing weight throughout the vehicle.

 Redesign: The main thing we would have changed was the axle system. We found out that wood axles in wood frames created a large amount of friction. If done again, we would have used plastic for both, and then our design would have traveled far further. Furthermore, we could have lowered weight even further in the front wheels, which could have been thinner.

Technological Resources: We used three tools/machines: the belt sander, drill press, and mousetrap. Electrical energy was used to power the two tools. We used records and plastic for wheels, as well as wood for the axles and chassis. George and I created the vehicle, along with the guidance of Dr. Sartori, in the time of nearly three weeks from start to finish. We had to utilize new information on energy and friction, as well as safety precautions to construct the design.

Biggest Challenge: Beyond a doubt, our greatest challenge was fine tuning the length of the dowel rod to supply enough force to even move the vehicle, while still maximizing distance. At first (and for the next six tests) our design moved only five feet and sometimes not at all. To overcome this, we had to continually shorten the length of the dowel rod, and cut out part of the middle of the chassis to minimize weight. It took a long time before we were satisfied with the movement of the vehicle.

What we learned: We discovered how to use several tools to make more polished designs. We also had to apply concepts of energy perhaps even more so than in the previous project; if the science was flawed or ignored, the design would do poorly. We saw this many times from the other designs in the class, as many didn't even considered friction at all. Also, we learned that foresight is important -- once we had our friction generating wood axle implemented, we had no time to fix it.
The Model T extracted potential energy from gasoline, a magical proposition at the time


Monday, October 28, 2013

The Nearly Successful Egg Drop Experiments


Project Overview: There were two parts to this project. The first was a mini egg drop, where limited resources were given such as paper, popsicle sticks, and rubber bands. Our intention was to protect the egg from increasing drops up to several meters. In the second part, we designed a more effective design with materials we could bring from home, with the goal of protecting the egg from falls of one to two stories.

Technological Concepts: Quite a few concepts were learned in this project. We had to learn how aerodynamics affected the fall of an object. We learned how to manipulate how impulses were exerted on the design, where increasing the distance and thus time decreased the force applied to the egg. Crumple zones and "seat-belts" were used to accomplish this mainly. Minimizing acceleration, or rate of change in velocity over time, was important to some designs. Managing inertia, or the tendency for objects to remain in motion or at rest unless acted on by an outside force, was important for all designs to consider.

Learning Goals: While learning the concepts was important, this project focused on applying the design process with an actual goal. We learned to research, brainstorm ideas, implement them, test them, and use feedback to improve our designs. Well thought out, effective designs were the goal of this process, whether we had limited or abundant resources.
Mini Egg-drop Design

Mini Egg-Drop Design: We used an absorbing pad, with a net of string that would absorb the impact. This idea implementation failed, but we also had rubber bands above the egg attached to popsicle sticks, which were very effective at absorbing the force. A rubber band around the side secured the egg. However, the sides of the egg were left entirely vulnerable. In the second test, the design fell on its side, and the egg instantly broke.

Big Egg-Drop Design, before cotton
Big Egg-Drop Design: We took the egg and put it into part of an egg carton. Then, rubber bands were attached to the ends of the box which secured the egg in place. Furthermore, cotton was placed all around the box to increase the absorbing potential of the design. Lastly, egg carton segments were placed on the side of the box striking the ground, which acted as a crumple zone.

Our design succeeded for the one-story drop, with no damage to the egg at all, or the design. On the two-story drop, our poor aerodynamics caused the box to flip and land on the railing on its side, which our design was not intended for. It broke quite badly on this test.

Positive Feedback: The project did a good job of teaching the design process, and I was reasonably satisfied with the way our second design did its job. Throughout the design, we used feedback on mini-tests and added cotton and egg carton segments to improve its performance.

Redesign: If given a second attempt at the project, the premise would be very similar. However, a square box with rubber bands from all six sides would be used for stability from any angle. Foam would be used inside the box as a more effective method of absorbing force. Perhaps even foam on the outsides would be used to truly safeguard the egg.

Technological Resources: We had me, George Lancaster, and the advice of Dr. Sartori. This labor was enacted by us, with the information we held. Time was also a resource given into this several week project. Lastly, materials were the limited materials given by Dr. Sartori in the mini egg-drop, and the box, rubber bands, cotton, and egg cartons for the big egg-drop.

Biggest Challenge: The biggest challenge for the mini egg drop was trying to keep the egg secure in the design, in a way that it wouldn't jostle. For the big egg drop, weight was our main problem. We had the deftness and dexterity to create the design, but we really couldn't put as much padding in as we wanted to to due to the weight limit.

What We Learned: George and I learned how to use the design process to decide on a given design, and make an effective device that could accomplish a given goal, by a given time. I was able to apply concepts that I learned last year to an actual application. Lastly, George and I learned that it was wise not to stick perfectly to our design; by remaining flexible and open to new ideas, we made our design far more effective that it would have been otherwise.

We weren't allowed to use parachutes for the big egg drop, but can you imagine how magical using one in real life would be!

Monday, October 14, 2013

What is Technology?

Technology is any human-made object designed to solve problems or advance human potential.

There are three fields:
  1. Physical -- This includes areas like transportation, manufacturing, constructing, and other inorganic technologies.
  2. Information/Communication -- Send or receiving information, by human or machine. The internet and telephone are examples.
  3. Bio-related -- Biology related technologies like prosthetics, human safety devieces, cloning, and environmental protection.
To utilize technology, systems may be created. A system is a network which converts an input to an output through a specific process, with feedback that governs it.
        There are two types of systems within the Universal Systems model. The open-loop system has no means to automatically use feedback to alter the input/process, and requires external intervention to control the system. The closed-loops system automatically monitors feedback and controls the input and process.
 

 There are seven resources of technology:
  1. Tools/Machines/Processes -- Any technologies that are utilized in a system
  2. Materials -- Resources from the earth
  3. People -- The skills and knowledge of individuals
  4. Capital -- The money required to enable a system
  5. Energy -- The heat, electricity, or other energy necessary
  6. Time -- Any time the system requires
  7. Information - Knowledge people have garnered

Raw materials, people, time, tools, and energy are all inputs of this system
To use this knowledge, the problem solving process is essential.
  1. Identify the Problem -- Define what the need is.
  2. Set goals - These should be realistic, considering the resources.
  3. Research -- Acquire the necessary information to solve the problem.
  4. Create Ideas -- Freely brainstorm ideas.
  5. Select the Best Ideas -- Rank your ideas by their strengths, and select the best design overall based on your need.
  6. Implement -- Make the design into reality.
  7. Test -- Use the idea in real life situations.
  8. Feedback -- Evaluate the test results, and adjust the design to improve its effectiveness.

Nuclear Reactors, composed of very complex open and closed-loop systems, once were considered magical. They still are to many even today.

About the Author

My name is Russell Warila, and I am in the class of 2014. Cross country is my primary focus, of which I am part of the varsity team. Right now this is really the activity I'm putting all my energy into. I am also a member of NHS, and occasionally do ultimate frisbee. Engineering looks to be the field I will be studying in college, although I don't have interest in any specific field yet. I will be looking to figure that out as I learn more about them -- however, I find very interesting the "magical" technologies like quantum technology and our current adventures in nuclear fusion, among other specific technologies.
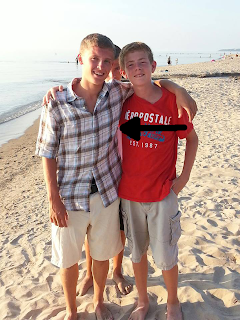
I am on the left


"Any sufficiently advanced technology is indistinguishable from magic."  - Arthur Clarke


                       One such "magical" technology is the quantum computer.